
“Looking for the best authentic Filipino lumpia recipe? Discover how to make these world-famous
Filipino spring rolls from scratch. This step-by-step guide covers everything from the traditional ground pork filling to the secret of achieving that signature extra-crispy golden-brown texture. Perfect as a party appetizer or a savory snack, these bite-sized delights are best served with a side of sweet chili sauce or banana ketchup. Get the full ingredient list and pro-tips for freezing and frying below.”
In addition to the financial benefits, homemade recipes can be:


- more satisfying and enjoyable to make and eat
- delicious and nourishing for yourself and others.
- relaxing and therapeutic activity, as it allows you to be creative and engage your senses.
Homemade recipes can also be a great way to bond with friends and family. Inviting others to help with the cooking process or sharing a meal together can be a fun and enjoyable way to spend time together.
Finally, homemade recipes can be more environmentally friendly than store-bought or restaurant-prepared food. When you make your own food, you can reduce the amount of packaging and transportation involved, as well as the energy used to produce and transport the ingredients.
Overall, homemade recipes offer a range of benefits, including better control over ingredients and amounts, cost savings, enjoyment and satisfaction, social connections, and environmental benefits. Whether you are a seasoned cook or just starting out, making your own recipes can be a rewarding and fulfilling experience.
✅ Quick Tips: Read the recipe in its entirety before you start cooking. This will help you understand the ingredients, steps, and timing involved, and allow you to prepare any necessary equipment or ingredients beforehand.
Filipino Lumpia/ Spring Roll
Description
In every Filipino household, no party is complete without a towering golden pile of
Lumpiang Shanghai. These aren’t just spring rolls; they are miniature embodiments of festivity and a cherished ritual passed down through generations. Our recipe features the perfect balance of savory ground pork, minced carrots, and aromatic garlic, all tucked into a paper-thin wrapper that shatters with every crunch. Whether it's a birthday, a holiday, or just a Tuesday craving, learn the art of the perfect roll and bring a piece of Filipino hospitality to your kitchen.
Ingredients
Instructions
-
Prepare Filling
In a large bowl, thoroughly combine the ground meat, carrots, onion, garlic, egg, and seasonings until well-mixed.
-
Separate Wrapper
Carefully peel the thin wrappers apart. Keep them covered with a damp paper towel to prevent them from drying out and cracking.
-
Roll the Lumpia
Lay one wrapper in a diamond shape.
Place about 1–1.5 tablespoons of filling near the bottom corner and shape it into a thin log.
Fold the bottom corner over the filling, then fold in the left and right sides.
Roll tightly toward the top corner. Brush the top edge with egg wash or water to seal. -
Frying
Heat about 2 inches of oil in a skillet
Fry in batches for 3–5 minutes, turning occasionally, until the wrappers are deep golden brown and the meat is cooked through. -
Drain & Serve
Drain on a wire rack or paper towels. Serve hot with sweet chili sauce or banana ketchup.

Nutrition Facts
Servings 1
- Amount Per Serving
- Calories 90kcal
- % Daily Value *
- Total Fat 5g8%
- Saturated Fat 1.5g8%
- Cholesterol 20mg7%
- Sodium 150mg7%
- Total Carbohydrate 56.5g19%
- Sugars 7.5g
- Protein 6g12%
* Percent Daily Values are based on a 2,000 calorie diet. Your daily value may be higher or lower depending on your calorie needs.
Note
Recipe Variations
- Lumpiang Gulay (Vegetable): A meatless version often featuring bean sprouts, cabbage, sweet potato, and tofu. The filling is usually sautéed and cooled before wrapping.
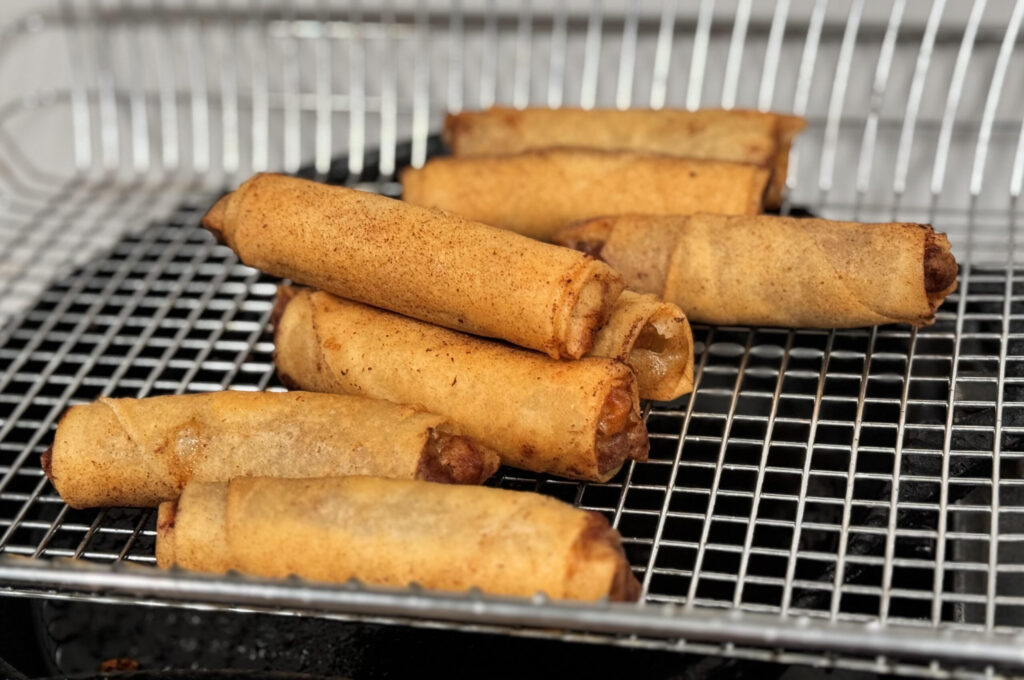
- Healthy Alternative: You can air-fry lumpia at 370°F for about 12 minutes or bake them at 400°F for 20–25 minutes for a less oily version.
- Freezing: Assembled, uncooked lumpia freeze beautifully. Place them in a single layer on a tray to freeze solid before moving to a zip-top bag; they can be fried directly from frozen.